Managing Analysis
Analyzing and effectively managing your CDM and associated files is critical to generating valid and meaningful report results that are actionable. VitalCDM's Coding and Billing Analysis helps you identify exceptions, such as deleted and invalid HCPCS codes and modifiers, or codes not recognized by the OPPS (Outpatient Prospective Payment System). You can also compare coding and billing data with peer hospitals using the Standard Analytical File (SAF) Peer Data Analysis.
Analysis definition file
An analysis definition file must be created to designate which fields to use in the analysis process. Organizations have access to run, view, and manage analyses.
Creating a new analysis
Note
After an analysis date passes, the date automatically updates for the next quarter.
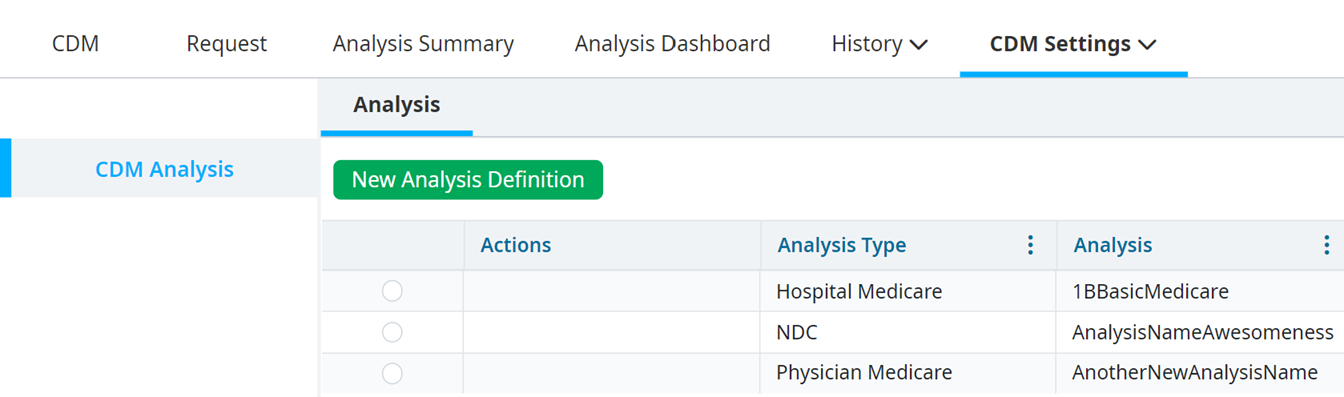
Select CDM Settings > Analysis Settings.
Select the Entity and CDM File.
Select New Analysis Definition to display on the Managing Analysis tab.
Enter or select the following, as necessary:
Analysis Name – The name to describe a specific report type. Each analysis is available as a report filter (i.e., CPT/HCPCS, Medicare, etc.).
Analysis Type – The type of analysis. Select the fields you want analyzed from the CDM file once the analysis type is selected.
Entity for Wage Index – The facility settings set by your organization's account manager.
Run this analysis immediately upon import – Automatically triggers the analysis upon import of a new CDM file.
Analyze for quarterly prospective – Analyze the current CDM file information in comparison with future rules as they become available. The analysis can be set to refer to a single hospital’s settings if an organization has a single CDM file for multiple hospitals. This impacts Wage Index and Locality reports.
Select your selections from the dropdown menus in each column.
Override column defaults by providing override fields, if needed.
Select Save or Run after you select or enter all of the appropriate information.
Note
The columns are populated based on the fields identified during the CDM file definition process. Contact your Vitalware manager for further assistance if an expected field is missing.
Example of overriding fields
There are two HCPCS columns: a default column and a Medicare column. You can set the Medicare field as the override field because the Medicare field is not always populated. If the Medicare code is blank, this falls back to the default field.10. Click Run or Save after you make your selections.
Viewing the analysis settings tabs
The SAF Peer Data Analysis and Pricing Analysis tabs appear after you click Save if you select Hospital Medicare as the Analysis Type.
SAF Peer Data Analysis
You can analyze the price field in the CDM file against the price published in the Standard Analytical File (SAF) for up to 20 different user-defined hospitals.
An inflation multiplier can be added to increase the published prices for each CPT/HCPCS in the SAF data.
If a specific hospital did not submit a particular code to CMS enough times to meet the minimum threshold, it displays "0" for the price of that CPT/HCPCS.
Data won’t be available if a CPT/HCPCS code was not submitted to CMS and paid.
To set preferences for selections in the SAF Peer Data Analysis tab:
Select the SAF Peer Data Analysis tab. Click the dropdown menu next to the Search hospitals... field to select the search method for specific hospitals.
Double click the line item to move it to Hospitals selected when the list of hospitals appears in Available Hospitals for Selection.
Add a value to the Inflation Multiplier field to increase the published price by that specific percentage.
Double click on the line item to remove a hospital from Hospitals selected. It moves to the Available Hospitals for Selection.
Click Save to save your selections for use each time this analysis is performed.
Comprehensive coding Analysis
The Comprehensive Coding analysis allows a single analysis to review all CPT/HCPCS, Modifier, and Revenue Code fields for coding concerns, such as deleted or invalid codes. This analysis also finds all deleted codes for every CPT/HCPCS column.
Pricing Analysis
You can include specific information in the Pricing Analysis report. The data elements here display for each specific CPT/HCPCS listed in the CDM file if they are included in the SAF data published by CMS. If a CPT/HCPCS code is not submitted to CMS and paid, no data is available.
Select the Pricing Analysis tab. You can search for a specific state in the text field next to the magnifying glass icon.
Double click the line item in Available States for Selection to move it to States Selected.
Select the options you want from Available Charge Columns by double clicking on the line item to move it to Charge Columns Selected.
Remove options you no longer need from Charge Columns Selected by double clicking on the line item to move it to Available Charge Columns.
Click Save to save these selections for use each time the CDM file is analyzed.
Manually run an analysis
Follow the steps below to run an analysis manually without importing a new file.
Select CDM Settings > Analysis Settings. The Analysis Settings window displays the CDM analysis tab.
Select the Entity and CDM File.
Right-click on the analysis.
Click Run Analysis.
Click OK to run the analysis.
Setting an analysis as inactive
If you are a CDM Administrator, you can set an analysis as inactive if it is no longer needed.
To set an analysis as inactive, do the following:
Select CDM Settings > Analysis Settings. The Analysis Settings window displays in the CDM Analysis tab.
Select the Entity and CDM File.
Right-click the analysis you want to edit.
Select Inactivate Analysis.
Managing analysis
Analyzing and effectively managing your CDM and associated files is critical to generating valid and meaningful report results that are actionable.
Select Tools > Analysis Details. The Analysis Settings window displays in the CDM Analysis tab.
Select the Entity and CDM File.
View the Analysis settings that are currently saved for the selected Entity and CDM File. This allows you to review the following:
- Analysis Name
- Created By
- Date Created
- RI (run on import). This true if Run this analysis immediately upon import is selected. It is false if not.
- Prospective Analysis Date shows the date entered if Analyze for quarterly prospective is selected. It is blank if not. This date determines the set of data utilized for the analysis and reports.
Right-click the analysis, then select Edit Analysis to edit the analysis settings.