Managing Queue Fields
Adding fields
The Field List section enables customized columns (fields) of data to be displayed, edited, or hidden from each queue within the route. This section also allows for specific field instructions to be entered and managed.
Select CDM Settings > Workflow Settings.
Select the Entity and CDM File.
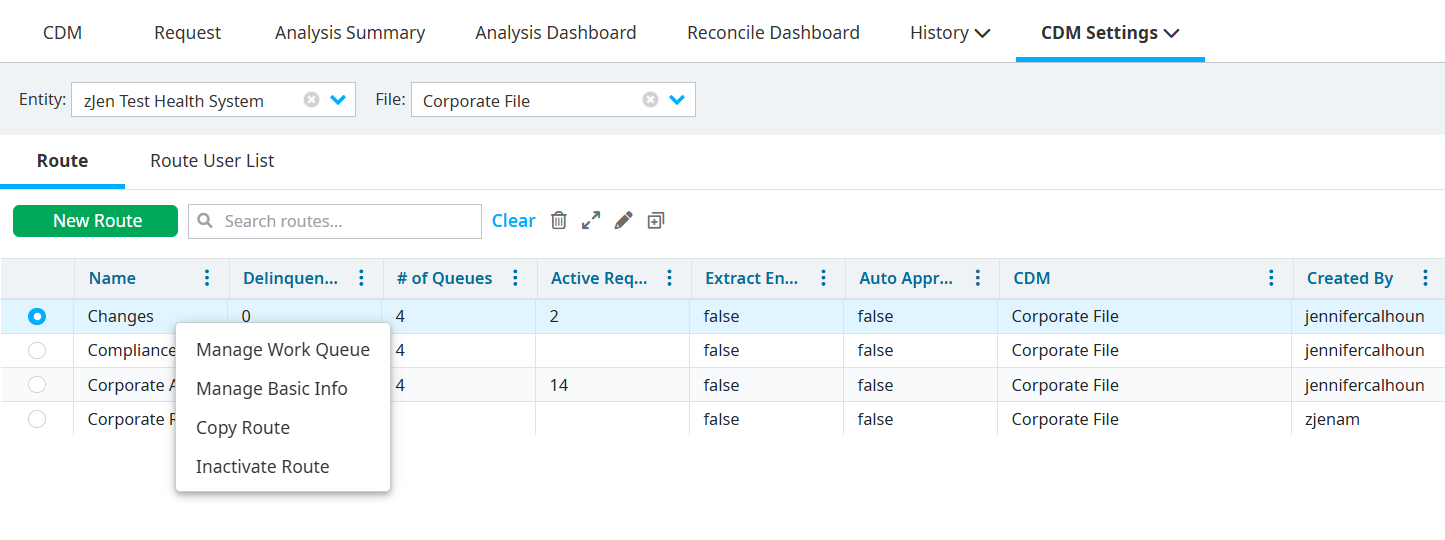
Right-click a route.
Select Manage Work Queue. A new tab titled the name of the route displays in the Workflow Settings.
Select Field List from the tab titled the name of the route.
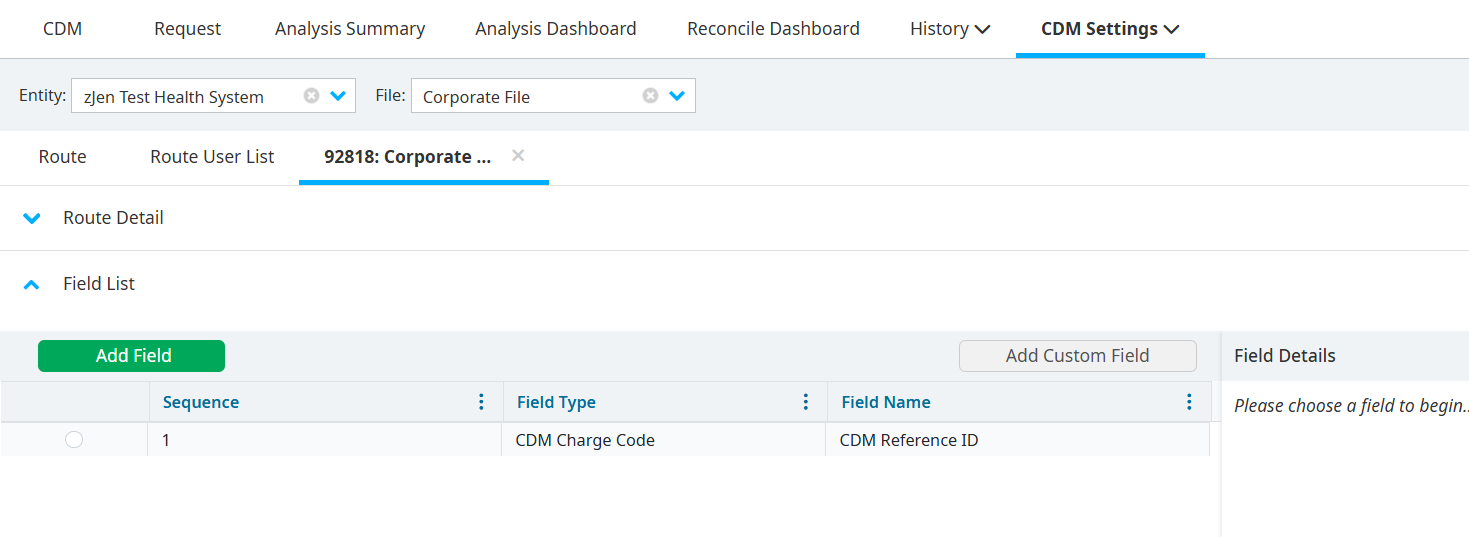
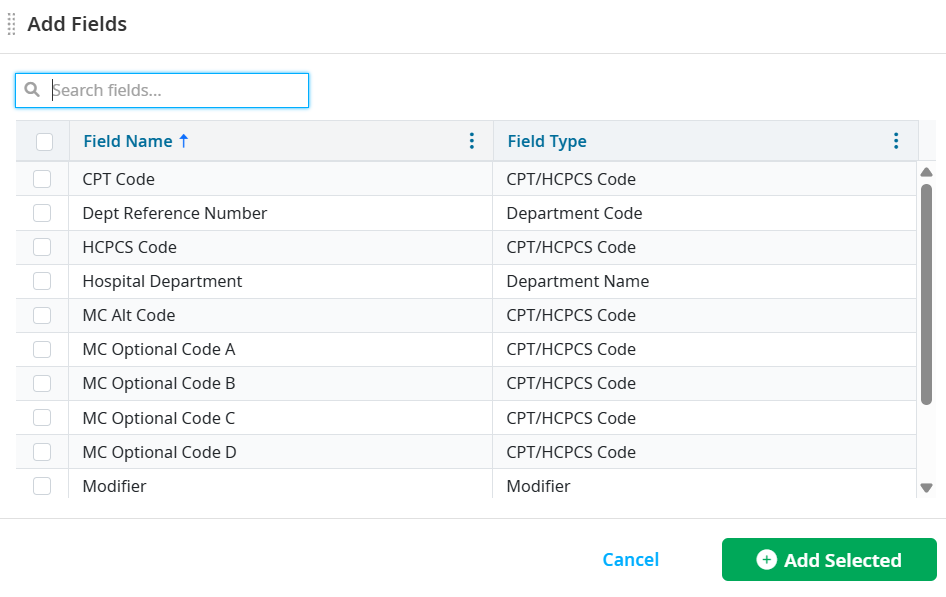
Click Add Field to view the list of available fields.
Select one or more field names and field types to be displayed within the work queue.
Click Add Selected.
Adding custom fields
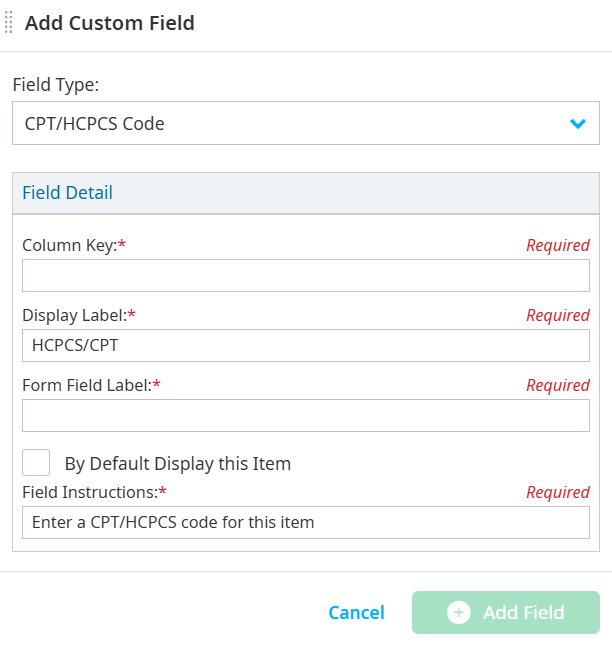
To add a custom field:
Select Add Custom Field.
Select the Field Type from the dropdown.
Enter any additional required information for your custom field.
Select By Default Display this Item, if needed.
Select Add Field.
Setting field details and permissions
Field permissions can be set specifically for each work queue, allowing workflow access to the information required with the appropriate permissions to edit.
Within the Work Queue Detail section of the Field Details pane, each stage within the queue can be customized to either Edit, Read-Only, Hide, or Required.
Note
Clicking on another field prior to saving your work displays a notification prompting you to confirm a potential loss of unsaved information.
To edit field details and permissions:
Right-click a route in the Route tab.
Select Manage Work Queue. A new tab titled the name of the route displays in the Workflow Settings.
Select Field List from the tab titled the name of the route.
Click on an available field to display its details on the Field Details pane.

Modify the fields, if needed. Field details can be modified depending on the field type.
- Modify the Display, Form Field, and Field labels.
- Enter a default request value if the field is auto populated with a default value.
- Create a dropdown list in the Select List textbox. Each entry must be separated by commas. The order listed in this field is the order that is listed in the dropdown list.
- Accept only current or future dates for date fields, if needed.
Scroll down on the Field Details pane to the Work Queue Detail section.
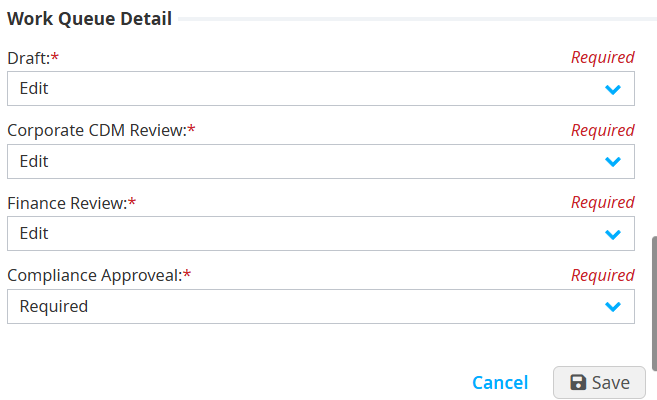
Set field permissions for each field in each queue. When each queue is listed, the following options are listed in the Draft and Conifer CDM Approver dropdowns:
- Edit – Allows users with access to the work queue to modify the field.
- Read-Only – Displays field to users with access to the work queue route but does not allow the field to be modified.
- Hide – Does not display the field to users within the work queue route.
- Required – Does not allow users with access to the work queue route to submit or approve a request unless the field is populated.
Note
The edit field is the default permission for each field in each stage, except for Charge Code. The default permission for Charge Code is Read-Only. Make the appropriate selections in the Work Queue Detail section to modify this setting.
Deleting fields
Right-click a route in the Route tab.
Select Manage Work Queue. A new tab titled the name of the route displays in the Workflow Settings.
Select Field List from the tab titled the name of the route.
Select a field.
Click the Remove Field icon.

Select OK to delete the field and return to the previous screen.