Code Validate
The Code Validate module enables searching for Medical Necessity issues and CCI edits in a single entry pane. Code Validate has the following calculators and groupers:
- Inpatient/MS-DRG Grouper
- Outpatient/Facility
- Professional/Physician
- DME
- Home Health
- OPPS Calculator Outlier Payments
- Billable Units Calculator
Accessing Code Validate
To access Code Validate from the Vitalware homepage Dashboard:
Select Products > VitalKnowledge.
Select the Code Validate tab.
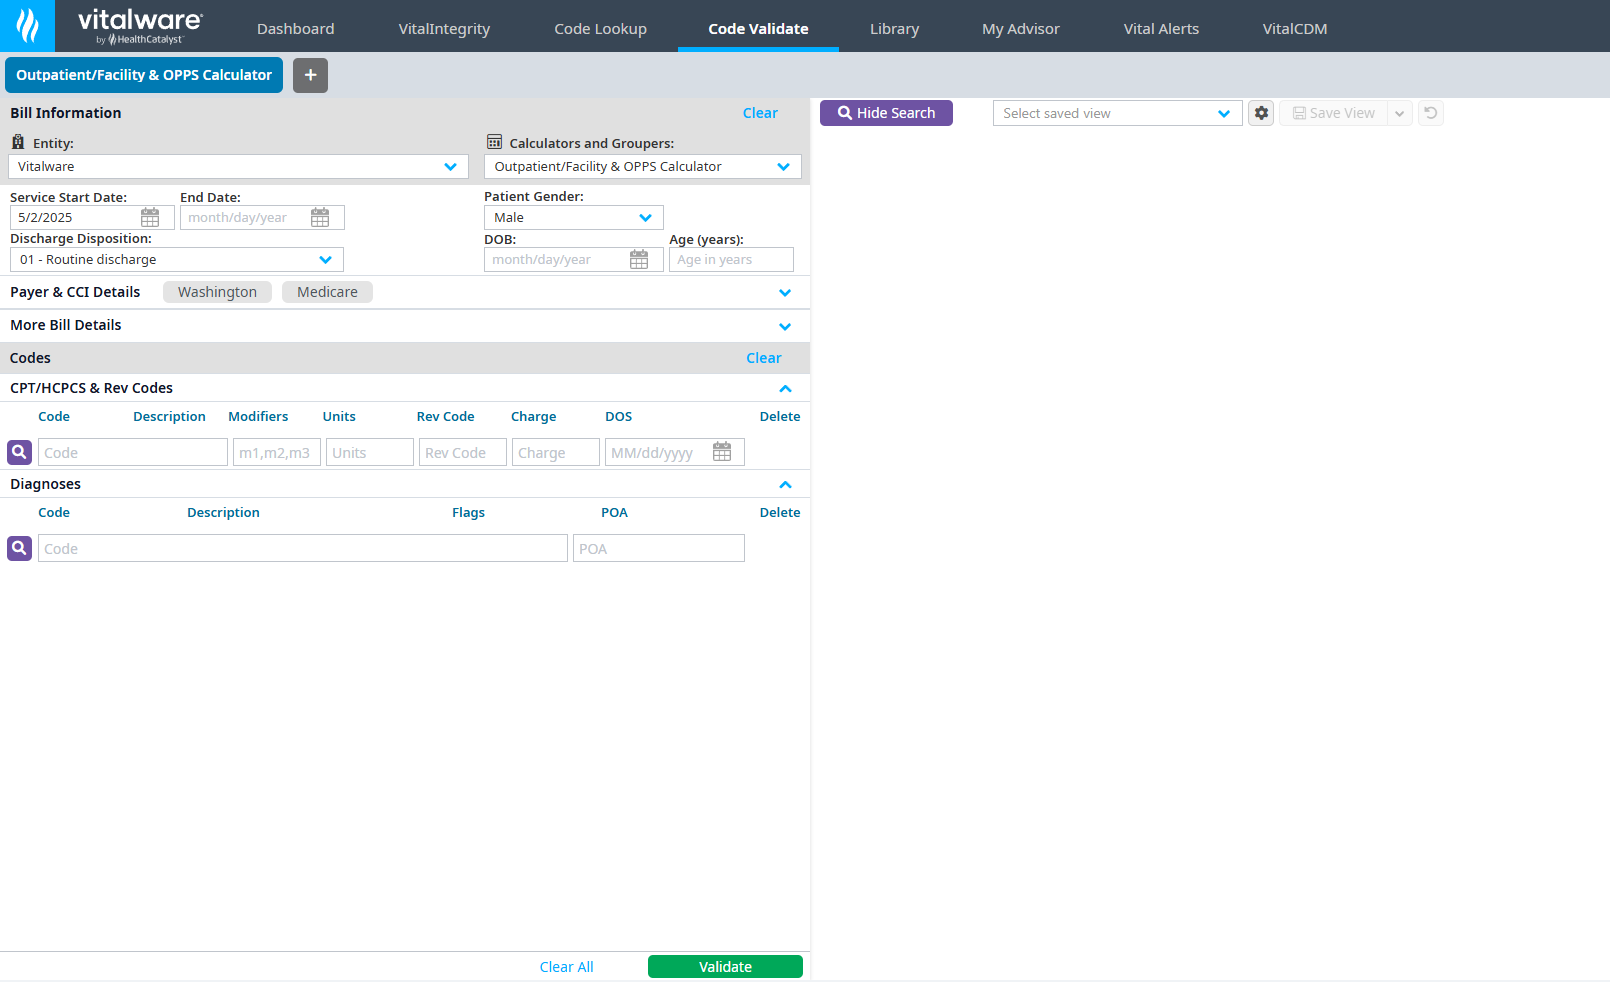
Claim input validation
The Bill Information pane on the left defaults to your primary entity.
You can select from one of the following calculators and groupers:
- Inpatient/MS-DRG
- Outpatient/Facility
- Professional/Physician
- DME
- Home Health
- OPPS Calculator
- Billable Units Calculator
Inpatient
Enter the Admitted and Discharged dates. The length of stay (LOS) populates automatically.
Select the Discharge Disposition.
Enter the date of birth in the DOB field. The patient's Age populates automatically.
Select the patient's Gender.
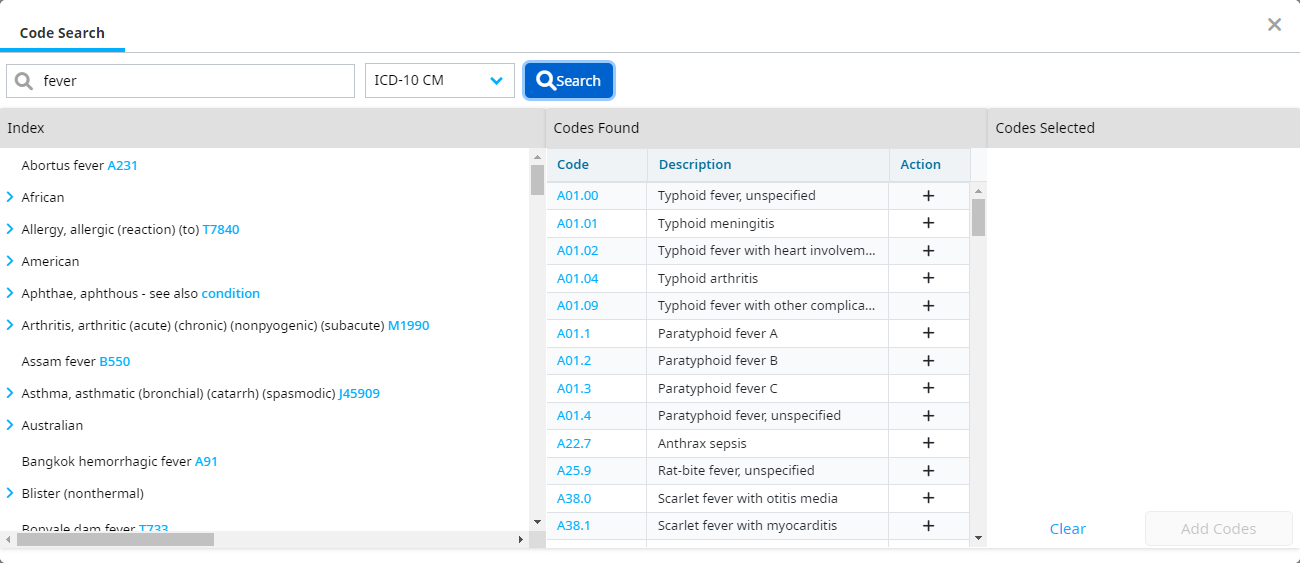
Click the Search button for the type of code you are entering. The Code Search dialog opens.
Enter a code, description, or keyword.
Click Search.
Click Add Codes after you have selected all of your codes.
Repeat for the other code types you are entering.
Click Validate once you have entered all codes.
Click into the codes on the Validation Results pane to further assess code information. Deleted codes are displayed as invalid.
Outpatient
Select the patient's Gender.
Enter the date of birth in the DOB field. The patient's Age populates automatically.
Enter the Date of Service.
Select the Medicare or Medicaid radio buttons to view information regarding Medicare or Medicaid standards in the CCI tab on the Results table.
Select a state from the Commercial & Medicaid Med. Nec. dropdown to view that state's policy information in the Commercial & Medicaid Med. Nec. tab. The appropriate contractor is assigned using the type of bill and state selected.
Click the Search button for the type of code you are entering. The Code Search dialog opens.
Enter a code, description, or keyword.
Click Search.
Click a code in the Index section, or click the plus sign in the Codes Found section to add codes the Codes Selected section, if needed.
Click Add Codes after you have selected all of your codes.
Repeat for the other code types you are entering.
Click Validate once you have entered all codes.
Click into the codes on the Validation Results pane to further assess code information. Deleted codes are displayed as invalid.
Note
Click the X to the clear the selection you made for the Commercial & Medicaid Med. Nec. dropdown. This only clears that specific selection, so you do not have to clear all of your selections in Code Validate
Professional
Select the patient's Gender.
Enter the date of birth in the DOB field. The patient's age populates automatically.
Enter the Date of Service.
Select the Commercial or Medicare entity.
Select the State. The appropriate contractor is assigned using the type of bill and state selected.
Click the Search button for the type of code you are entering. The Code Search dialog opens.
Enter a code, description, or keyword.
Click Search.
Click a code in the Index section, or click the plus sign in the Codes Found section to add codes the Codes Selected section, if needed.
Click Add Codes after you have selected all of your codes.
Repeat for the other code types you are entering.
Click Validate once you have entered all codes.
Click into the codes on the Validation Results pane to further assess code information. Deleted codes are displayed as invalid.
DME
Select the patient's Gender.
Enter the date of birth in the DOB field. The patient's age populates automatically.
Enter the Date of Service.
Select the Commercial or Medicare entity.
Select the State. The appropriate contractor is assigned using the type of bill and state selected.
Click the Search button for the type of code you are entering. The Code Search dialog opens.
Enter a code, description, or keyword.
Click Search.
Click a code in the Index section, or click the plus sign in the Codes Found section to add codes the Codes Selected section, if needed.
Click Add Codes after you have selected all of your codes.
11 Repeat for the other code types you are entering.
Click Validate once you have entered all codes.
Click into the codes on the Validation Results pane to further assess code information. Deleted codes are displayed as invalid.
Home health
Select the patient's Gender.
Enter the date of birth in the DOB field. The patient's age populates automatically.
Enter the Date of Service.
Select the Commercial or Medicare entity.
Select the State. The appropriate contractor is assigned using the type of bill and state selected.
Click the Search button for the type of code you are entering. The Code Search dialog opens.
Enter a code, description, or keyword.
Click Search.
Click a code in the Index section or click the plus sign in the Codes Found section to add codes the Codes Selected section, if needed.
Click Add Codes after you have selected all of your codes.
Repeat for the other code types you are entering.
Click Validate once you have entered all codes.
Click into the codes on the Validation Results pane to further assess code information. Deleted codes are displayed as invalid.
OPPS calculator
The OPPS (Outpatient Prospective Payment System) calculator module is a pre/post bill analysis and research tool for hospital outpatient claims that assists with the constantly changing reimbursement rules.
OPPS Calculator includes the following:
- Coding and reimbursement analysis using the rules that were or are in effect for the date of the claim
- Wage and locality adjustment payment rates
- I/OCE edits including special processing conditions applied to outpatient claims
- Outlier reimbursement where appropriate
- Details of potential line item/claim level denials or rejections
Select the Start Date and End Date.
Select the patient's Gender.
Select the Discharge Disposition.
Select the Type of Bill.
Select the Condition Code, Occurrence Code, and Value Code from the Codes pane.
Click the Search button for the type of code you are entering. The Code Search dialog opens.
Enter a code, description, or keyword.
Click Search.
Click a code in the Index section, or click the plus sign in the Codes Found section to add codes the Codes Selected section, if needed.
Click Add Codes after you have selected all of your codes.
Repeat for the other code types you are entering.
Click Validate once you have entered all codes.
Click into the codes on the Validation Results pane to further assess code information. Deleted codes are displayed as invalid.
Note
Reimbursement information is gathered from the CMS website and is presented for illustrative purposes only. This information provides no assurance of coverage or reimbursement and does not constitute official coding or billing guidance. This information reflects payment estimates only and is not a guarantee of payment. Vitalware makes no guarantee regarding this information or its applicability with respect to any particular patient or third party payer. Service providers are responsible for their decisions related to coding and reimbursement submissions based on the official regulations and other interpretive materials as necessary.
Billable Units calculator
This feature provides clear financial calculations in complex and potentially costly areas, ensuring more accurate and timely billing.
The calculator renders the allowed number of billable units based on the HCPCS code description when you enter Codes, Dose Administered, Unit of Measure, Dose Wasted, Quantity, Drug Form, and Date of Service.
Click the Search button for HCPCS. The Code Search dialog opens.
Enter a code, description, or keyword.
Select ICD-10 CM, ICD-10 PCS, CPT/HCPCS, or NDC/Pharmacy.
Click Search.
Click the plus sign in the Codes Found section to add codes to the Codes Selected section.
Click Add Codes after you have selected all of your codes.
Select the Dose Administered and Unit of Measure, Dose Wasted and Unit of Measure, Quantity, Drug Form, and Date of Service for each code.
Click Validate.
Click into the codes on the Validation Results pane to further assess code information. Deleted codes are displayed as invalid.