Analysis Reports
VitalCDM includes predefined analysis reports, which can be customized. This allows you to add specific criteria that may not be included in the predefined analysis reports.
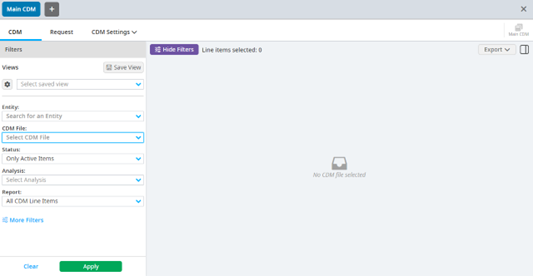
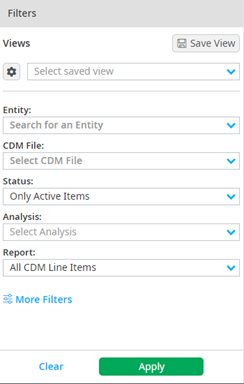
The Filters pane opens to display the available filtering options when you access VitalCDM. The Results table does not display anything by default until you perform a search.
Note
If you have more than one chargemaster file defined in VitalCDM, a default chargemaster can be set to auto-display in the second dropdown selection. Contact your Account Manager if you would like a default to display.
Filter CDM reports and analyses
The Filters pane offers multiple criteria for you to filter through the chargemaster, including field values, analysis definitions, departments, and more. These filters work as an AND operation, meaning all filters are used when you click Apply to display results.
The filter options that appear on the Filters pane are dependent upon your organization’s selected preferences.
Note
Whether or not all of these filter options are available for you is dependent on what your organization has selected for use in VitalCDM.
The following are all possible filter options available for the Filters pane:
| Filter Option | Functionality |
| Entity | Use the Entity dropdown to change the entity. Your corporate or health system account displays by default if you have access to multiple hospitals or entities. |
| CDM File | Use the CDM file dropdown to change the file, if you have access to multiple CDM Files. |
| File and Group radio buttons | VitalCDM can show multiple files grouped together in one single view, allowing organizations to assess information from multiple locations at once. Select the Group or File radio buttons if your organization has defined Group(s). The additional filters that appear on the Filters pane reflect if you select Group or CDM File. For example, an additional filter that includes all CDM Files in the group is available when you select a Group. You also have the option to set a limit on which files display in the Group view. |
| Status | VitalCDM defaults to display Active line items. Use the Status dropdown to display Deactivated line items or both Active and Deactivated line items. You can also exclude items from the analysis process. If items were excluded from the analysis process, this filter may contain two additional options to see Only Excluded Items or Active and Excluded Items. |
| Analysis | Organizations can create more than one analysis per file. For example, if your organization wants to analyze multiple Fee Schedules, they can create an analysis for each one. Use the Analysis dropdown to select which analysis you want to reference. |
| Report | See the Report filters section for more information. |
| Report Group | See the CDM analysis reports section for more information. |
| Departments | Use the Departments dropdown to select specific departments. Departments display in numerical order. If your organization uses Departments, the Cost Centers filter options do not appear on the Filters pane. |
| Cost Centers/Revenue and Usage/Associated Cost Centers | If your organization uses Cost Centers, the Departments filter option does not appear on the Filters pane. |
| ACK Status | Use the ACK Status dropdown to select a specific ACK Status. |
| Utilization Range | Use the Utilization Range to filter the ranges of utilization dates submitted to Vitalware. |
| Usage Start Date and Usage End Date | Select the Usage Start Date and Usage End Date if your organization submits monthly revenue and usage. You can search by monthly, quarterly, or year-to-date. |
| More Filters | See the More filters section for more information. |
CDM analysis filters
Each CDM file can have one or more analyses built to allow reports to run against specific data elements within your chargemaster. The fields used in the analyses are CPT/HCPCS codes, revenue codes, modifiers, and price fields.
Additional filter options display when you select an option from the Analysis filter. The Analysis Dates filter displays a list of past dates and times that the selected chargemaster file was analyzed. This allows you to review prior versions of the chargemaster based on an analysis date.
The values displayed are the values that were present at the time of the selected date. If no value is selected, the most recent analysis displays.
Some reports have additional fields that display on the Results table. This is a result of the analysis process, as data elements used in creating the results automatically display.
CDM analysis reports
Selecting an analysis displays a filter option to see all reports or those that are commonly generated monthly, quarterly, or annually. Select the Report Group dropdown to view the analysis reports available.

Selecting a report from the dropdown list and clicking Apply displays the analysis report data and incorporates any filters selected on the Filters pane.
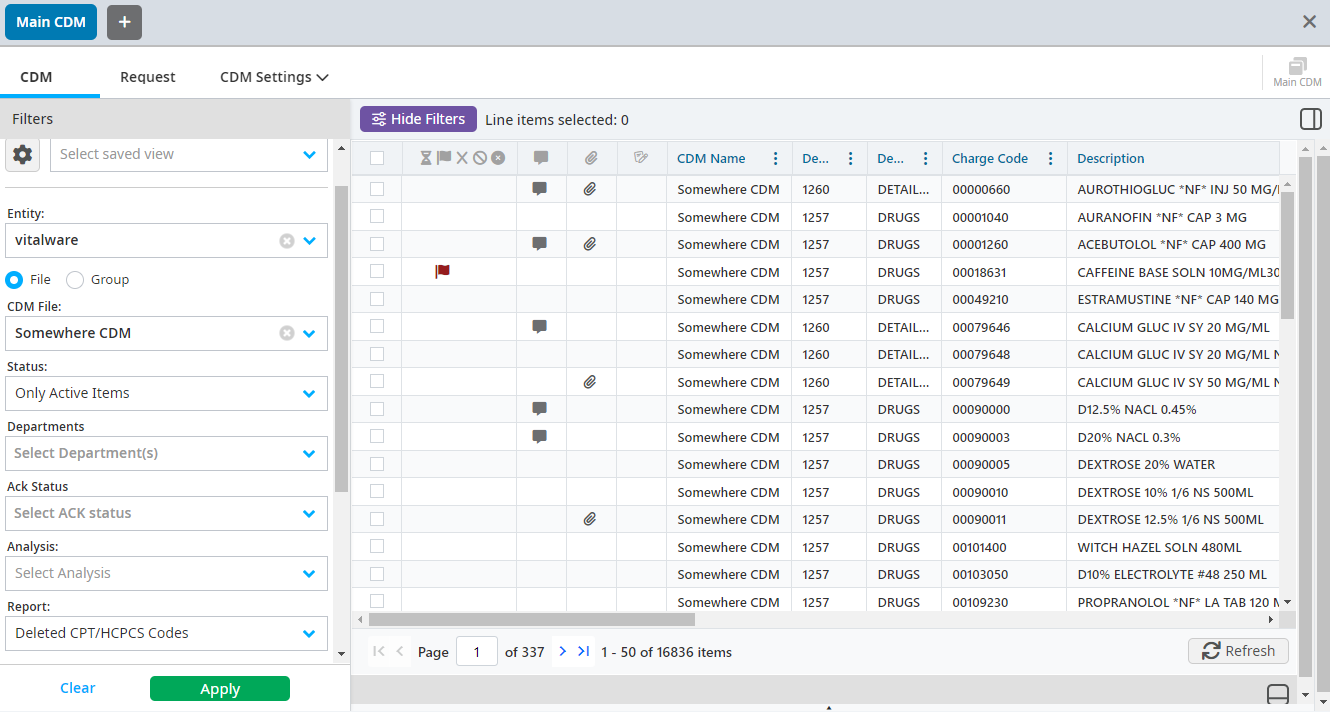
An example of a Deleted CPT/HCPCS Codes report with no filters in place.

An example that shows the same Deleted CPT/HCPCS report with a filter applied.
Report filters
Report filters vary depending on the report you select for review. Standard filters that display consistently are:
Organization (Hospital/Facility Name) - If only one CDM file exists for your organization, it is the default. If more than one CDM file is available, a dropdown is available. A default CDM file can be set by your organization’s account manager, or it can be saved using the Save File Selections below.
- Active/Deactivated Items
- Departments
- Analysis
Suggested Scheduled CDM Reports - The default view is All CDM Reports. If another filter is selected, the list of reports is filtered to only show the reports that are suggested for review on a monthly, quarterly, semi-annual, or annual basis.
- Report
- Analysis Dates - Selecting a specific analysis date reports the CDM file data on that date
- Last Import date - This is informative only (it isn’t an interactive filter)
- Utilization Range
- Basic Filters
- Advanced Filters - Includes both Term and Analysis field options
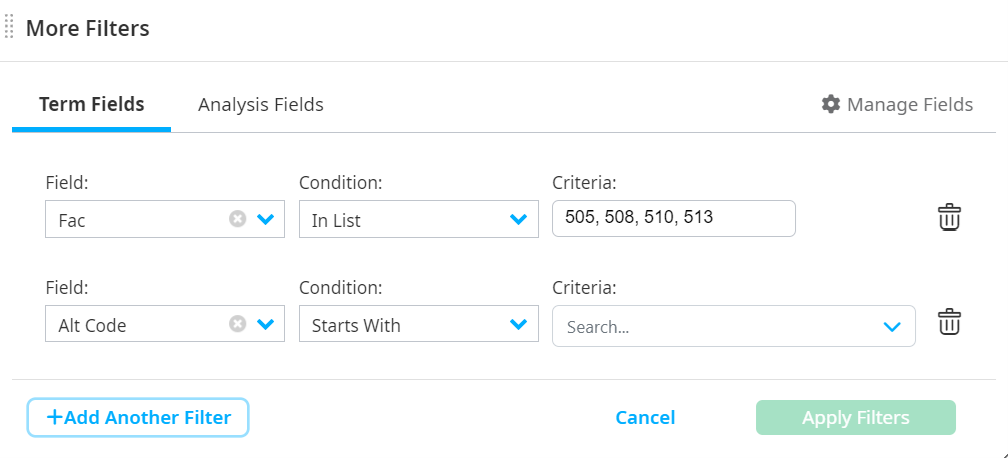
More Filters
To add more filters:
Click More Filters at the bottom of the Filters pane.
Select the criteria for the Field, Condition, and Criteria dropdowns.
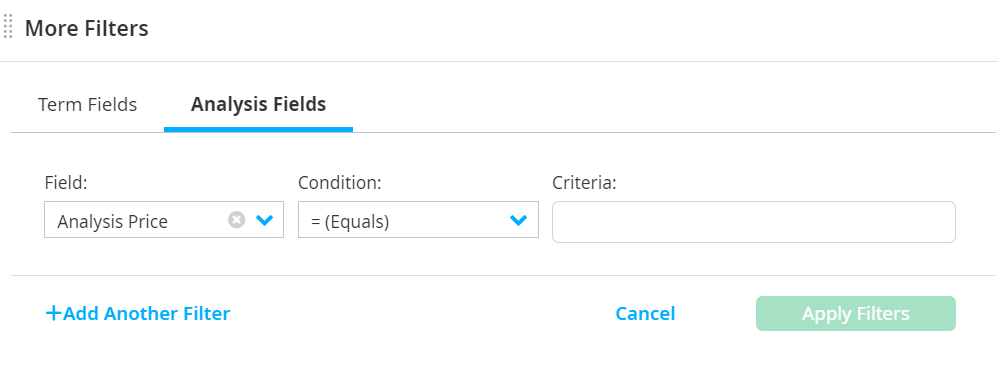
Select the Analysis Fields tab to enter criteria for the Field, Condition, and Criteria dropdowns, if you selected an analysis on the Filters pane.
Click Add Another Filter to filter multiple fields simultaneously, if needed.
Click Manage Fields in the Term Fields tab to reorder your list of fields (VitalCDM orders fields alphabetically by default) or hide any fields you prefer to not see, if needed. You also have the option to reorder fields by dragging them to your desired location.
Select a checkbox in the Hidden column to remove a field from the filter list.
Click Close to exit the Manage CDM Filter Fields popup without saving, if needed.
Click Reset to reset all fields to the original layout and disregard any changes you have made in this session or previous sessions, if needed.
Click Save to save your edited fields.

Click Apply Filters on the More Filters popup when you have inserted all desired criteria.
Customize the Results table
The Results table is customizable, and you can rearrange columns into your preferred view.
The following are options for customizing the Results table:
Select the column header then drag and drop the column in your preferred location.
Alter the width of the columns by moving your mouse between the headers and dragging the mouse to the desired width.
Select the three-dots icon in a column header to sort by ascending or descending.
Select the three-dots icon to view a list of all possible column options (some column options may not be set up to display in your default view). Select or deselect checkboxes next to the titles of column options to determine which ones appear on the Results table.

Saved views
Save the current view after you have performed a search and organized the columns on the Results table.
To save your view:
Select Save View on the Filters pane.
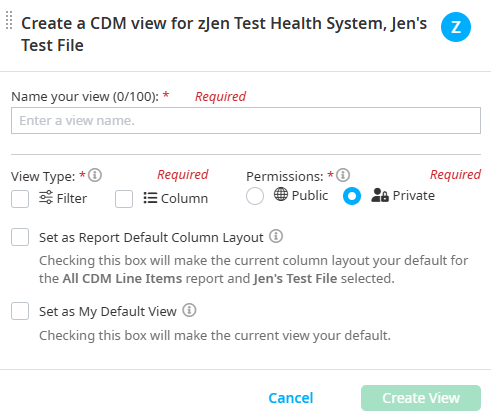
Enter a name for your new view.
Select the criteria for the following options:
- View Type - Select one or both:
- Filter - Include filter selections (analysis, department, additional filters, etc.).
- Column - Include the column order, as well as any sorting you have applied.
- Permissions (Admin users only) - Select whether this view will be Public (available to other users) or Private.
- Set as Report Default Column Layout - Saves the current column layout as the default for the selected report.
- Set as My Default View - Saves the search criteria as the default to display when you open VitalCDM.
- View Type - Select one or both:
Select Create View.
Edit saved views
Select the cog icon (Manage views) on the Filters pane.
Edit any views you have created on the Manage CDM Views popup. The views you created have your name in the Owner column.
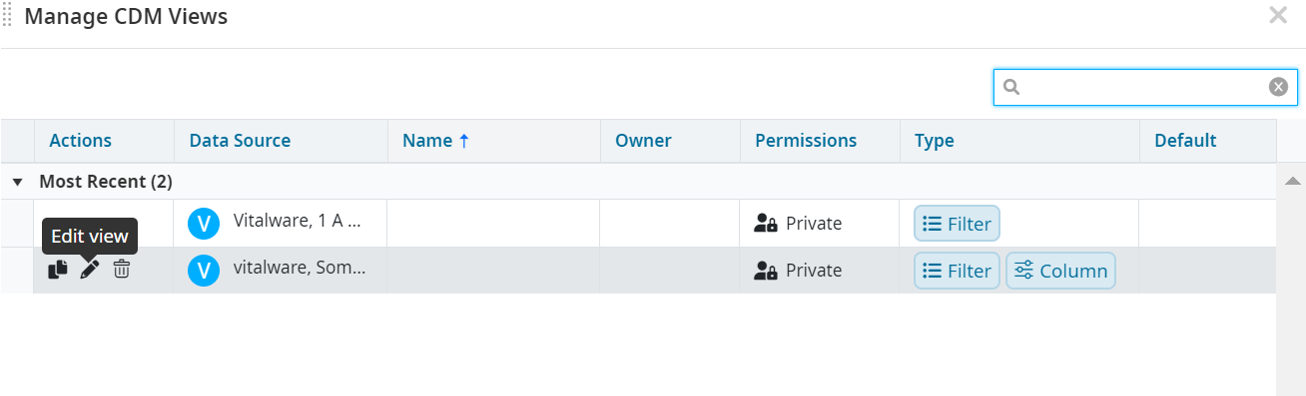
Click the Edit view icon in the row of the view you created.
Do one of the following:
- To update the view with new options, change the View Type and Default options as necessary, and then click Replace.
- To create a new view using the current view, change the Name of the view, then change any options as necessary and click Save New.

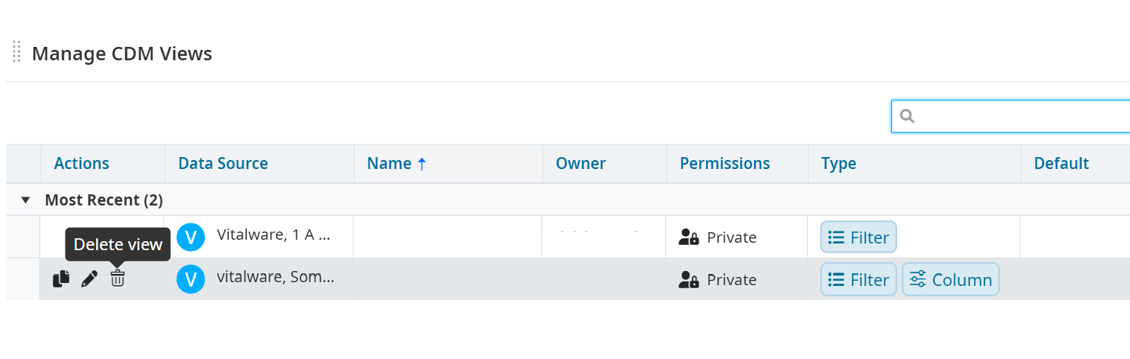
Delete saved views
Select the cog icon (Manage views) on the Filters pane.
Delete any views you have created on the Manage CDM Views popup. The views you created have your name in the Owner column.
Click the Delete icon on the row of the view you want to delete.